
Understanding the layer caching mechanism when building a Docker image for better Dockerfile writing
The Issue
Docker has recently become popular in the IT community, with more and more people using it. The frequency of Docker appearing in job descriptions has also increased. My company uses Docker, my projects use Docker, projects that I work on for others also use Docker... Docker has emerged as a very convenient "packaging" solution for the automation revolution.
However, a long-standing issue with Docker has been the time-consuming process of building Docker images. The size of a Docker "image" can sometimes reach several gigabytes, turning Docker into a "hard drive killer". Jokes have been made asking if you have enough hard drive space to use Docker for CI/CD. But in this article, I will not discuss how much disk space it consumes, but rather focus on how to reduce the speed of building Docker images.
There are several ways to speed up the build process and reduce the size of Docker images, such as installing only necessary packages, using lightweight base images (alpine), and using the fewest layers possible. They all revolve around the issue of minimizing the download of necessary files by Docker and keeping them as lightweight as possible.
Additionally, another way to speed up the process is by leveraging Docker's layer caching. So let's continue reading this article to find out more.
Utilizing the order of image layers to your advantage
A Docker image is formed by stacking layers on top of each other. Each layer represents an instruction in the image's Dockerfile. For example, consider a Dockerfile like this:
FROM ubuntu:18.04
LABEL org.opencontainers.image.authors="[email protected]"
COPY . /app
RUN make /app
RUN rm -r $HOME/.cache
CMD python /app/app.py
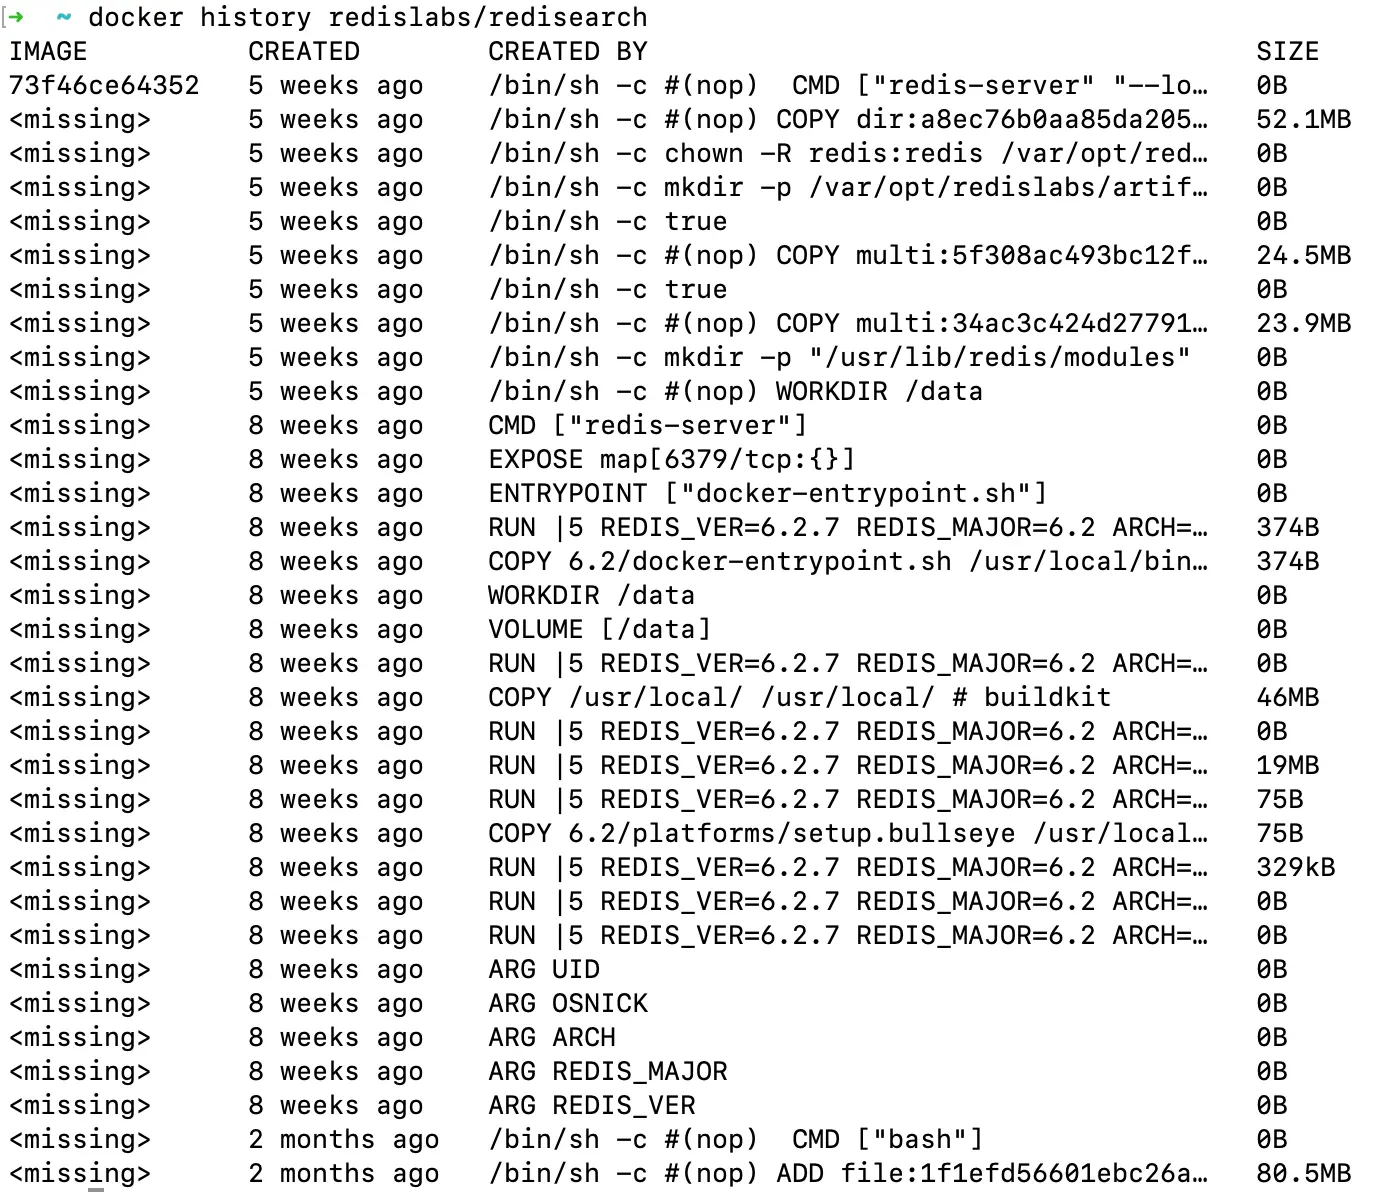
Each line represents a layer, and they have different sizes depending on the amount of work they do. The total size of the layers contributes to the overall size of the image. So, to understand this better, you can use the docker history <image> command to see the details of the layers that make up an image.
Here's an example of the layers and size of a redislabs/redisearch image:
$ docker history redislabs/redisearch
The result would look something like this:
Each time you use the docker build command, Docker has to go through each layer sequentially. However, if you take advantage of layer caching, Docker only needs to rebuild the layers starting from the layer that has been changed. This means that the layers that haven't been changed will be executed almost instantly. This way, you only spend time on the first run, and subsequent runs will be much faster as Docker utilizes the cache to build the image.
Here's an example of a Dockerfile for a Node.js application:
FROM node:18-alpine

WORKDIR /app

COPY . .

RUN npm install
Dependencies rarely change, so the chances of needing to run the npm install command are quite low. But in the given example, the COPY command clearly disrupts this and causes changes in the layer, so normally, all the layers after it would need to be executed without any buffering. It means that you would spend time and network bandwidth running the npm install command afterwards. This is truly a nightmare in this era of cut-off cables.
To make use of the layer caching mechanism, you can modify and rearrange the order of the layers as follows:
FROM node:18-alpine

WORKDIR /app

COPY package*.json ./
RUN npm ci

COPY . .
As you can see, if the package or package-lock.json file changes, npm ci will be executed. Otherwise, the two commands above will be executed almost instantly.
Conclusion
There are several ways to speed up the build process and reduce the size of Docker images. One of them is leveraging Docker's layer caching mechanism to arrange the order of layers in a way that minimizes changes, thereby speeding up the build process of your images.
References:

The secret stack of Blog
As a developer, are you curious about the technology secrets or the technical debts of this blog? All secrets will be revealed in the article below. What are you waiting for, click now!

Subscribe to receive new article notifications

Comments (0)