
Talking About How to Call Google Services' APIs
The Issue
Integrating with third-party APIs is a common task, and the implementation and calling methods vary depending on the system you're integrating with, such as HTTP methods, client authentication, permissions to access specific endpoints, and more. Each party has its rules and requirements that need to be followed for successful API calls.
I don't know if any of you have integrated with Google APIs, but I have done it a few times. The first time was when I needed to call the Google Sheets API to write data to a user's private sheet. At the beginning, I spent a few days researching how to do it, reading Google's documentation, and feeling a bit overwhelmed by their presentation, which was somewhat hard to understand, especially for those without prior experience. Fortunately, I eventually managed to integrate it, allowing me to write data by requesting access to my Google account with permission to write to that Sheets file.
Some time later, when I needed to integrate the Google Analytics API, it was a similar experience. Perhaps it had been a while since I had worked on such integration, so I had forgotten how to do it. However, this time it took less time as I gradually remembered the previous workflow.
I thought that there might be others facing similar situations, so this article is not only a record of how to do it but also a guide for newcomers in this field, hoping it will be helpful to you.
Authentication and Authorization
First and foremost, there are a few key points to clarify. Understanding some concepts and integration flows makes everything easier to comprehend. Google provides two concepts: Authentication and Authorization, which allow us to interact with their system's APIs on behalf of users. After successful authentication and authorization, we can comfortably call the API to interact with their data.
So, what are authentication and authorization?
Simply put, authentication is the process of proving that you have access rights to an account by logging into your Google account. By entering your account information and password, you authenticate successfully. Authorization, on the other hand, is the process of creating OAuth 2 Credentials to request permission to read/write user data. Once users grant authorization to our application, we immediately gain the privilege to call the API.
Where does the authorization manifest?
It's when you obtain the user's Access Token, which has been authorized for your application. Using this token, you can access information. Most Google services require an authorized Access Token to access data.
To summarize, the process of making API calls goes like this: Create OAuth 2 Credentials -> Use those Credentials to request access to a user's specific service -> Obtain an Access Token -> Use that token to call the API.
Pretty concise, right?
Apart from the authentication and authorization via OAuth 2 Credentials mentioned above, there's another way to obtain an Access Token. However, this token isn't for users but is a Google Service Account token. If you've noticed, Google allows us to add other Google accounts to manage with specific permissions, such as read/write or administrative access. A Google Service Account can be considered a special Google account that can be added as an administrator. In this way, it also has access to user data and can be used to retrieve user data via the API.
Two Methods of Accessing Services (Authorization)
To keep this article concise and avoid complicating things, I will only present the main ideas of the two authorization methods. Example code will be provided in subsequent articles.
Scope
Before discussing the two methods, take some time to learn about scope because it's essential.
Scope in OAuth 2 is crucial as it specifies what permissions you are requesting from the user. For example, it can be permissions to read information like full name, avatar, email address, or permissions to add/edit/delete user data. Therefore, use scope to request only the permissions you genuinely need to avoid requesting unnecessary permissions that could risk the user's account or lead to the user refusing permission.
You can find a list of scopes at OAuth 2.0 Scopes for Google APIs.
Scope is always present in your code, wherever there is an authentication and authorization request for the user. Keep this in mind when writing code later.
Using the User's Own Account with Access Rights
Here, we are talking about using a user's account with access rights. If you can obtain an authorized Access Token from this account, you can make API calls. This was also my initial approach to gaining access to user data.
This method is relatively straightforward and includes the following main steps:
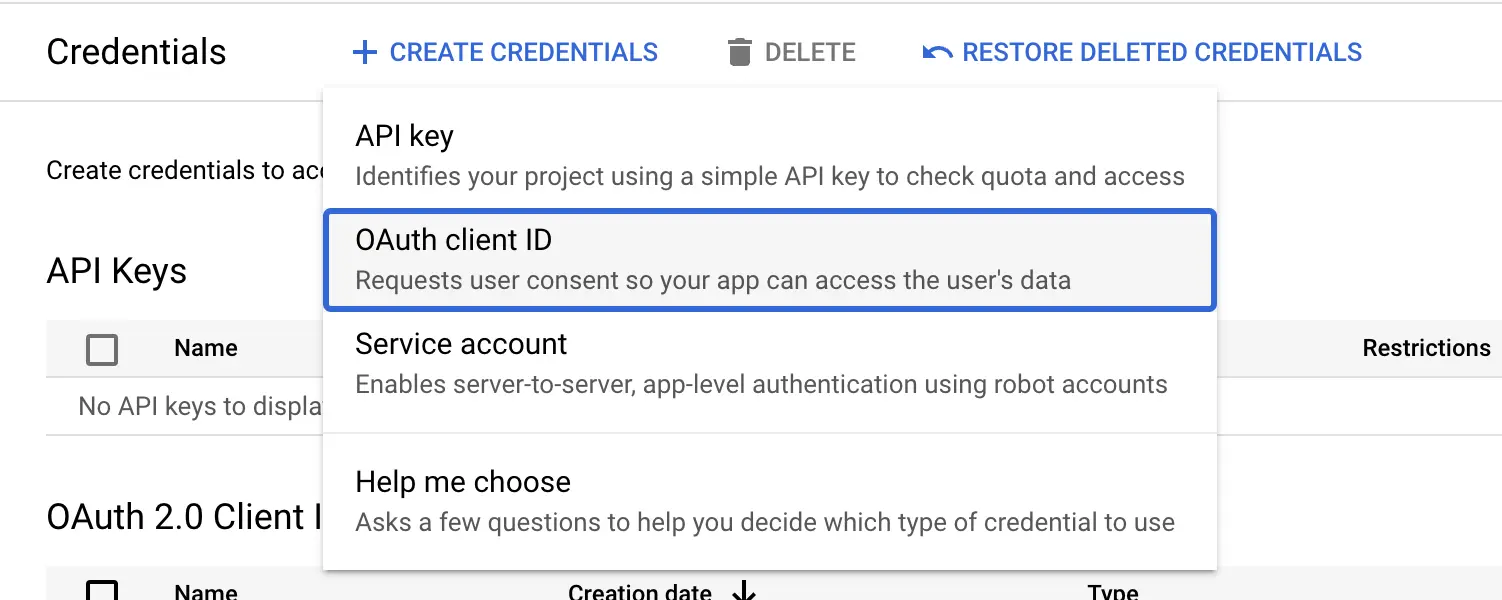
- Create OAuth 2 Credentials by accessing Credentials.
- Use the Client ID & Client secret generated to authenticate and authorize the user's account.
- Obtain an Access Token and Refresh Token, store them somewhere for future API calls.
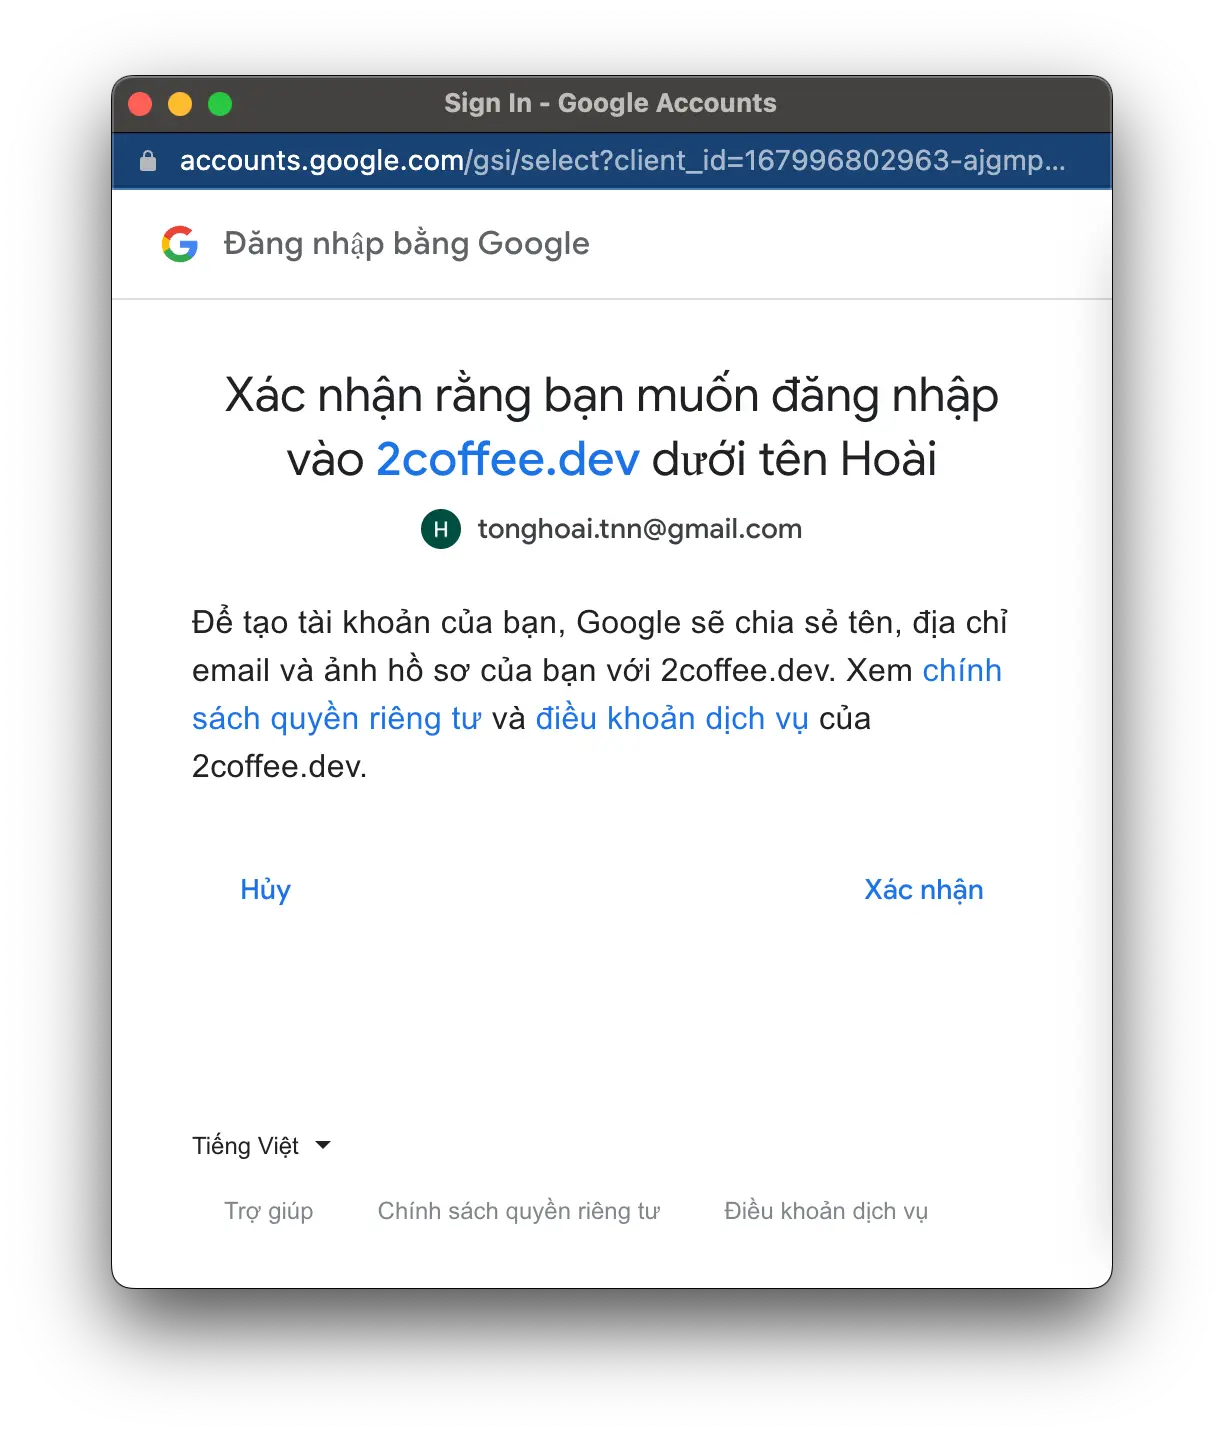
After creating the Client ID, embed it into your website using Google's SDK. When users click the "Login" button, a popup will request access, and if users agree, you will obtain the token, and vice versa.
However, this method has some limitations, such as requiring direct permission from the user's Google account, risking the exposure of personal information, and more. Therefore, there is a second method described below.
Using Google Service Accounts
Google Service Accounts (GSA) is a feature of the Google Cloud Platform (GCP) that allows applications and services to access resources in the GCP environment without using user login credentials. Service Accounts provide a way to authenticate and authorize applications and services to interact with GCP resources and APIs.
Simply put, GSA is a special Google account created and added to services to grant it access rights to data. GSA has a simpler authentication mechanism than user accounts; you only need to use a GSA configuration file to make Google API calls.
The steps for using GSA are summarized as follows:
- Create a GSA account and download a JSON-format configuration file.
- Add the created GSA account to Google services with read/write permissions as needed.
Use the corresponding Google-provided library for the service you want to interact with, add the configuration file to initialize the client, and perform API calls as usual. Using this method, we can protect user information without requiring permission from their accounts. All you need to do is add GSA to the administrator group with the desired permissions.
However, some services may not accept adding GSA accounts. Therefore, you should choose the authentication and authorization method that suits your needs for each service.
Calling APIs After Obtaining an Access Token
There are many ways to call APIs, with the simplest and most convenient being to use the libraries provided.
For example, if you're using Node.js and want to call the Google Sheets API, you can use the googleapis package. This library wraps most Google services, including OAuth 2, Google Sheets, Google Drive, Google Analytics, and more.
Another advantage of using libraries is that they handle the expiration of Access Tokens, automatically refreshing them using the Refresh Token. All you need to do is load the configuration file during client initialization, and the library will provide functions for checking and refreshing tokens.
Additionally, we can directly call APIs using the endpoints provided by Google, but this method is somewhat more fragmented and complex as it involves handling and storing a large number of endpoints.
Conclusion
Integrating with Google services' APIs for the first time can be time-consuming. However, after understanding the principles of authentication and authorization and knowing how to use the support libraries provided by Google, we can speed up the integration process in the future.

The secret stack of Blog
As a developer, are you curious about the technology secrets or the technical debts of this blog? All secrets will be revealed in the article below. What are you waiting for, click now!

Subscribe to receive new article notifications

Comments (0)